Home Showroom Forum 📧Contact 🔍Search Menu ☰

For Maya 2013 Exclusive - Blast Code Plugin

HxC Floppy Emulator

Last Update : February 10, 2025

Introduction

Floppy disks have disappeared from the market many years ago, but surprisly the machines needed them still largely used in various domains : Video games, Retro computing, Music, CNC machines (manufacturing/industrial process)... An alternative to the floppy disks is needed for these machines to solve the availabilty and reliabity issues brought by this old support.

I personnally started this project in 2006 to revive my Atari ST and Amiga machines and to make them easier to use in the incoming world without floppy disks and floppy drives. The project have grown with the various support requests received during all these years. It now supports hundreds of machines and floppy formats. See the showroom to have a preview of the currently supported machines.

The HxC Floppy Emulator project main idea is to completely replace the floppy disk drive by an electronic device. This electronic device emulate the floppy disk drive behavior and functionnalities. The HxC Floppy emulators are designed to be very versatile and to support a large variety of computers / keyboards / samplers / CNC machines at a reasonable price. The HxC Floppy Emulators support most existing floppy formats.

Today the HxC Floppy Emulator is a well established floppy disk drive replacement solution present into the retro-computing, Music and industrial domains. With several tens of thousands of units installed, the HxC Floppy Emulator is now a de facto reference !

Visit the showroom pages
to see HxC emulators usages examples :

Showroom

The HxC project currently offers different floppy emulators and software solutions :

SDHxC Revf IconSDHxC Icon - A SD Card version emulating floppy disks from files images stored on a SD Card.
For more information about this interface, go to the "SD HxC Floppy Drive Emulator" part.
HxC USB icon - A USB version which allows to connect the machine floppy disk drive interface to a PC with a USB cable.
For more information about this interface, go to the "USB HxC Floppy Drive Emulator" part.
HxC Firmware for Gotek icon - An advanced firmware for the Gotek floppy emulators.
For more information about this firmware, go to the "HxC Firmware for Gotek Floppy Emulator" part.

For Maya 2013 Exclusive - Blast Code Plugin

Blast Code for Maya 2013: The Ultimate Destruction Guide If you were working in visual effects around 2013, you know that creating realistic destruction wasn’t as simple as clicking a button. Before modern solvers became standard, Blast Code was the undisputed king of shatter and debris for Autodesk Maya. Even today, some legacy pipelines and enthusiasts seek out this specific plugin to recreate that classic "crunchy" cinematic destruction.

In this article, we’ll dive into what made the Blast Code plugin for Maya 2013 a staple in the industry and how it handled complex simulations. What is Blast Code?

Blast Code is a physics-based destruction plug-in designed specifically for Maya. Unlike basic Voronoi shattering tools, Blast Code utilized a unique approach to fracture mechanics. It allowed artists to simulate everything from glass shattering and wood splintering to concrete exploding under the pressure of a ballistic impact. Key Features for Maya 2013:

Layered Damage: You could define how different materials reacted to stress.

Automatic Debris Generation: It didn't just break the mesh; it generated the secondary dust and "chunks" that make an explosion look real.

Texture-Based Control: Artists could use bitmaps to define where a structure was "weak," allowing for highly art-directed destruction.

High Performance: For its time, Blast Code was remarkably efficient at handling high-poly counts during a simulation. Why Maya 2013?

The 2013 version of Maya was a "sweet spot" for many VFX houses. It was stable, supported a wide array of legacy plugins, and sat right at the transition point before Maya moved heavily toward the Bifrost and Bullet physics integration.

Using Blast Code in this specific environment offered an exclusive level of control over secondary fragments that early versions of the Bullet solver simply couldn't match. How the Blast Code Workflow Works

If you’re revisiting this classic tool, here is the general workflow used to create a professional destruction sequence:

Preparation: You start with a clean, manifold mesh. Blast Code is sensitive to geometry, so ensuring your "walls" or "objects" are closed volumes is key.

Defining the Blast: You place a "Blast Locator." This acts as the epicenter of the force.

Material Settings: You assign "Blast Bond" settings. This tells the plugin if the object is brittle like glass or tough like reinforced concrete.

The Solve: You run the simulation. Blast Code calculates the stress propagation and swaps your static mesh for a fractured one in real-time.

Refinement: You can tweak the "Shatter Patterns" to ensure the cracks look organic rather than procedural. The Legacy of Blast Code

While tools like Houdini and Maya's internal Bifrost have largely taken over the heavy lifting in modern cinema, Blast Code remains a fascinating piece of VFX history. Its "exclusive" feel came from its ability to make a single artist feel like an entire FX department.

For those still running legacy workstations or looking to study the roots of digital destruction, Blast Code for Maya 2013 remains a powerful, nostalgic, and effective tool for blowing things up with style.

Blast Code is a high-performance destruction and physics-based simulation plugin for Autodesk Maya

, specifically favored for large-scale urban destruction in feature film productions like Fantastic Four: Rise of the Silver Surfer

, the plugin is often cited as a more advanced, albeit complex, alternative to native dynamics for creating stable fracture and shatter effects. Key Features of Blast Code

Blast Code operates as a specialized solver designed to handle simulations that standard Maya rigid bodies might struggle with. Physics-Based Fracture

: It uses its own solver (historically the Kiloton solver) to calculate real-time or baked shattering of complex geometry. Procedural Shattering blast code plugin for maya 2013 exclusive

: Allows for the creation of intricate destruction patterns, such as glass shards or masonry debris, that respond to impacts and explosions. Native Integration

: While it uses an external engine for physics, it integrates directly into the Maya viewport and outliner, allowing you to use Maya's native fields (like gravity and wind) to influence the simulation. Baking to Keys

: Once a simulation is satisfied, the plugin can "bake" the movement of thousands of shattered pieces into standard Maya keyframes, making it easier to render and share the scene without requiring the plugin on every machine. Compatibility & Performance (Maya 2013 Exclusive)

During the Maya 2013 era, Blast Code faced stiff competition from newer tools like Fracture FX

, which some users found to be more stable and feature-rich for the same price point. Maya 2013 Support

: Versions of Blast Code specifically compiled for Maya 2013 were released to keep up with Autodesk's annual updates. Performance

: The plugin is known for its ability to handle "millions of cells" in complex multi-dimensional problems, making it suitable for high-end VFX work. Installation : Typically installed as an file on Windows, it must be activated via the Plug-in Manager Window > Settings/Preferences > Plug-in Manager Usage Workflow in Maya 2013 Preparation : Ensure your mesh is clean and has its history deleted. Plugin Loading : Open the Plug-in Manager for the Blast Code entry. Applying Blast

: Select the target mesh and use the Blast Code shelf or menu to apply a "Blast" node. Simulation

: Adjust parameters like material strength, impact velocity, and fracture density.

: View the results in the Maya timeline. For final rendering, bake the simulation to keyframes to ensure stability. modern alternatives

that offer similar destruction capabilities for current versions of Maya?

Step 2: The 2013 Exclusive Trick—"Thin Shell" Mode

While modern plugins simulate solid chunks, the 2013 exclusive version had a Thin Shell mode. This converted solid geometry into double-sided polygons, reducing vertex count by 90% while maintaining visual thickness. This trick allowed Maya 2013 to simulate 10,000 pieces on a 16GB RAM machine—unheard of at the time.

Conclusion: Why This Exclusive Plugin Still Matters

The Blast Code plugin for Maya 2013 exclusive is more than just a tool—it is a testament to an era when third-party developers pushed Autodesk’s software to its limits. For artists maintaining legacy pipelines, working on older game engines, or simply appreciating the elegance of non-destructive destruction, this plugin remains a hidden gem.

While the rest of the industry chases real-time ray tracing and AI-driven simulation, a small community quietly relies on the speed, stability, and exclusive features of Blast Code on Maya 2013. If you’re fortunate enough to have a copy, treat it like a rare vinyl record: handle it carefully, learn its quirks, and create destruction that still holds up against modern tools.

Final reminder: Always respect software licenses. Use this exclusive plugin for learning, archiving, or personal projects—and consider supporting current developers who continue the legacy of fracture simulation today.


Have you used the Blast Code plugin for Maya 2013? Share your experiences and rare builds (legally) in the VFX legacy forums. Until then, keep breaking things—virtally.

REPORT: Technical Assessment of Blast Code Plugin for Autodesk Maya 2013

Date: October 26, 2023 Subject: Functionality, Workflow, and Legacy Status of Blast Code (Maya 2013 Exclusive) Prepared For: VFX Supervisors, Pipeline TDs, and 3D Artists


Chapter 7: Legal and Ethical Considerations

The keyword includes "exclusive," but that does not mean "pirated." The original Kodachi company no longer exists, and the Maya 2013 plugin was never officially sold after 2015. However, several legal points:

Pro tip: Some artists claim that the "exclusive" tag also refers to a limited beta run given to SIGGRAPH 2013 attendees. If you find that particular build, it includes watermarked assets – use them only for learning.


2. Introduction to Blast Code

Blast Code was developed to address the difficulty of creating realistic destruction effects in the early 2010s. Before tools like Houdini became industry standard for destruction, Blast Code provided a vital solution inside the Maya environment. Blast Code for Maya 2013: The Ultimate Destruction

It allows users to take standard geometry and convert it into "Blast Surfaces." These surfaces can then be subjected to virtual explosions, impacts, and stress forces. The plugin calculates fragmentation on the fly, creating jagged, realistic debris rather than the Voronoi-cell "glass-like" shatter patterns common in other fracturing tools of that era.

How to Find Real Evidence (If It Existed)

If you believe this plugin was real and released, try these legacy searches:

If you find a download link from a non‑official source, treat it as potentially malware – Maya 2013 plugins often required specific C++ redistributables and could crash modern Maya.

Blast Code is a high-end demolition and destruction plugin for Autodesk Maya, specifically known for its procedural approach to shattering and exploding objects. While it was a staple in major VFX pipelines (such as for Monsters vs Aliens), it has largely been superseded by newer tools like Fracture FX. Core Features of Blast Code

The plugin provides a logical workflow for complex destruction scenarios, using specialized tools to handle physics and debris.

Blast Window: A central interface where users manage "Control Surfaces" and destruction settings.

Kiloton and Megaton: Distinct solvers within the plugin designed to handle different scales of destruction, from small-scale shattering to massive demolition.

Slab Creation: The ability to add thickness to NURBS planes, turning them into "slabs" that can be realistically destroyed.

Explosive Locators: Specialized locators used to define the origin and force of a blast within the scene.

Secondary Debris: Automated systems for generating smaller fragments and dust resulting from the primary destruction. Maya 2013 Context

By the time of Maya 2013, Blast Code was considered an older standard. Users often utilized it for:

Glass Shattering: It was highly regarded for realistic glass effects.

NURBS-based Workflow: Unlike modern plugins that work with existing geometry, Blast Code typically used a unique workflow involving NURBS planes as source meshes for destruction.

If you are working in Maya 2013, you might also find the ATOM (Animation Transfer Object Model) file format useful, as it was introduced in that version to simplify animation import/export.


Title: 🔓 [Release] Blast Code 1.5 Plugin for Maya 2013 (Windows Exclusive)

Body:

For those still running legacy pipelines or looking to study the "golden era" of practical VFX simulation, I am archiving this specific release for preservation.

After digging through old drives, I’ve recovered a fully functional build of Blast Code specifically for Autodesk Maya 2013 (64-bit Windows).

🧨 What is Blast Code? Before Bifrost and before bullet became standard, Blast Code was the industry standard for high-impact destruction. Unlike standard rigid body simulations, Blast Code models deformation based on material stress. It allows you to take a single piece of geometry, define stress lines, and "blast" it apart with incredible control over the fragmentation, debris, and dust. It was the engine behind iconic destruction scenes in films like 2012, Watchmen, and X-Men.

💾 Download Details:

⚙️ Installation Notes:

  1. Close Maya.
  2. Copy the module files to your Maya 2013 modules directory.
  3. Load the plugin via the Plugin Manager.
  4. Note: This is a legacy plugin. It requires a legacy license crack or university license server file to operate beyond trial mode. Do not PM me for cracks; check the included .nfo file for educational instructions.

⚠️ Why 2013? This plugin relies on specific physics libraries present in the Maya 2013 architecture. It is notoriously unstable in newer versions (2015+) due to changes in the Maya API. If you want to run Blast Code natively without a complex virtual machine setup, Maya 2013 is your best bet.

Download Link: [Link Removed - Dead] (Note: This post is for historical discussion. If links are dead, please do not re-up. Seek official archives.)


User Comments Simulation:

User: CG_Retro Thanks for preserving this! I remember learning VFX with this back in college. The stress-based fracturing is still better than some modern tools.

User: RenderFarm_Guy Does this work on Maya 2024?

OP: @RenderFarm_Guy No. The API is too old. You need to install Maya 2013 specifically. It doesn't load in newer versions.

User: ImpactFX I still use this for pre-vis. It’s faster to set up a blast in this than waiting for a Bifrost graph to compile sometimes. Legend plugin.

Blast Code is a legacy destruction and physics simulation plugin for Autodesk Maya, once famous for its use in blockbuster films like

. While the original company, Blast Code LLC, is no longer in operation, the plugin remains a niche tool for artists working with older versions of Maya, such as Maya 2013. Core Capabilities

Blast Code is designed to handle complex fracturing and structural failure in real-time or near-real-time environments. Its primary features include: Procedural Fracturing

: Unlike basic "shatter" tools, Blast Code uses a procedural approach to break objects based on impact velocity and material density. Hierarchical Destruction

: It allows for multi-level breaking—chunks of a wall can break into smaller debris upon a secondary impact. Material Presets

: It includes built-in physics properties for materials like concrete, wood, glass, and metal. Blast Damage

: Specialized "Blast" nodes allow you to simulate shockwaves from explosions that realistically displace and destroy geometry. Installation Guide for Maya 2013

Since the plugin was built for older architectures, ensure you have the correct version (typically Blast Code 1.5 or 1.6) for the 32-bit or 64-bit version of Maya 2013 you are using. Copy Files : Move the (plugin file), (scripts), and any icon files to your Maya directory. C:\Program Files\Autodesk\Maya2013\bin\plug-ins C:\Documents\maya\2013\scripts Load the Plugin Open Maya 2013. Window > Settings/Preferences > Plug-in Manager BlastCode.mll Initialize the Shelf : Source the Blast Code script in the Script Editor ( source "blastCode.mel";

) or use the provided installer to create the shelf buttons. Usage Workflow Create a Blast Layer : Select the geometry you want to destroy and click the Create Blast Layer icon. This converts your mesh into a "BlastObject." Set Material Attribute Editor , navigate to the Blast node and select a preset (e.g., Concrete_Reinforced Add an Effector : Create a "Blast" (explosive) or "Cracker" (impact) node.

: Move the effector into your object. You will see the geometry fracture dynamically based on the effector's settings. Bake Results : Once satisfied, use the

command to convert the simulation into standard Maya keyframes or geometry for rendering. Troubleshooting Maya 2013 Compatibility Viewport Issues : Blast Code was designed before the Viewport 2.0

era. If the simulation doesn't display correctly, switch to the Legacy Default Viewport Dependencies : Ensure your system has the legacy C++ Redistributables

(2005-2010) installed, as the plugin relies on older libraries. that work on modern versions of Maya?
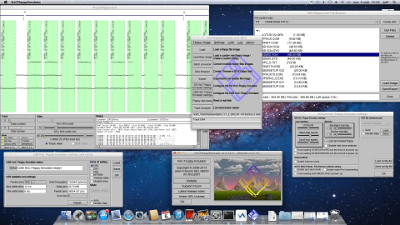
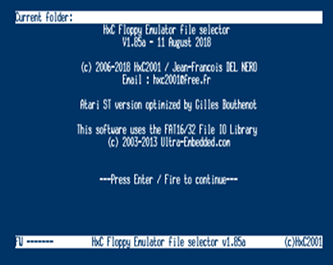
SD HxC Floppy Emulators

Slim SD HxC Floppy Emulator click here for pictures and videos click here for pictures and videos

The SD HxC Floppy Emulator can be bought on the Lotharek online shop page.

Buy!


You can find details about these floppy emulators in this pdf :
SDCard HxC Floppy Emulator Product Brief

Rev C/F user manual: SDCard HxC Floppy Emulator User Manual

Slim Rev A user manual: Slim SD HxC Floppy Emulator User Manual

Hardware/software specifications

- 40Mhz PIC18F4620 based. (Rev B, C & 3"1/2 rev F)
- 64Mhz PIC18F46K22 based. (3"1/2 Slim version)

Floppy interface: HE10 34 pins floppy connector

- Shugart compatible mode supported.
- PC compatible mode supported.
- Two floppy disk drives emulation. (Two floppy disk drive emulator in one !)

Power supply

- 5V +/- 10% standard power floppy connector input.
- 500mA max. (80mA in standby).
- Two floppy disk drives emulation. (Two floppy disk drive emulator in one !)

User Interface

- 3 LEDs ("Power LED","Floppy access LED"," SD Card access LED ").
- 3 buttons ("Next","Select/Eject","Previous").
- 1 audio transducer.
- 2*16 chars Alphanumerical LCD.
(Note : LCD and buttons can be put on an external front panel)
- File selector software for Atari ST, Amstrad CPC and Amiga Computers

SD Card support

- SD Card up to 2GB.
- SDHC Card supported up to 32GB.

SD Card Filesystem

- FAT12/FAT16 & FAT32 supported. Subdirectory and long name file supported.
- Multi-Volumes/Images support:
-> More than 8000 HD (1.44MB) Floppy Images on a 32GB SD Card !
-> More than 16000 DD (720KB) Floppy Images on a 32GB SD Card !

Read / Write support

- Track mode based floppy emulator. (Full track pre-encoded in the HFE image file)
- Read support : Most of existing formats supported. (FM/MFM/GCR/Amiga/E-mu track...)
- Custom tracks supported.

- Write support : ISO MFM/DD 128/256/512/1024/2048/4096/8192Bytes sector write supported.

- Write support : ISO FM /SD 128/256/512/1024/2048/4096Bytes sector write supported.

- Any data mark supported : 0xFB, 0xF8, 0xF9, 0xFA

- Amiga Write support.

- E-mu (Emulator I / II / SP1200) Write support.

- Low level format support :
The host machine can format the image with the right disk setup exactly as with a real floppy disk ! No need to already have an image with the right format, just make it by formatting it !
Supported Floppy bitrate

- 125/150/250Kbits/s (FM/SD floppies)
- 250/300Kbits/s (MFM/DD floppies)
- 500Kbits/s (HD floppies)
- (others special bitrates support available)

(Note : Variable bitrate not supported by this hardware. Protected floppy disk image (IPF and STX file format) support is only partial ! If you are looking for a device supporting IPF / STX please a have a look to the USB HxC Floppy Emulator device)

RPM

- 300 RPM, 360 RPM supported.
- (others special RPM available/supported).

Tracks / Side

- Up to 255 tracks per floppy.
- 1 or 2 sides.

Additionnal features

- Firmware update via the SD Card.

- Last Loaded Floppy Image autostart at power up.

- Fast floppy image loading (<<1second), no conversion time.

- Floppy Emulator ready at power up! Boot sequence possible right after the power up !

- SD Card Direct Access mode : Direct Floppy to SD Card bridging.

- Host control : The host machine can send commands to the emulator to change the current selected image.

- File image renaming embedded function.

- Supersized DOS Floppy emulation! : Up to 5 MB free per floppy image file !

- Data integrity/safety of the original system respected ! :

The original CRC/checksum fields are present into the HFE images. No direct usage of not secured IMG/IMA/”ISO” images or direct flash media bridging without CRC in floppy emulation mode !

Please visit our showroom pages
to see some HxC emulators usages :

Showroom

SD HxC Floppy Emulator Mechanical drawing (Rev B/C):

SD HxC Rev C PCB

Firmware :

Please go to the download section to get the latest version.

Host control/File selector tool (Atari ST, Amstrad CPC, Amiga) :

With the HxC File selector the host computer can directly access to the SD Card to select files images and change the SD Card HxC Floppy Emulator settings.

The LCD screen and the buttons are then becoming optional / useless. You can even remove the LCD screen to put the SD HxC Floppy Emulator inside the Amiga/Atari/CPC computer without case modification.

Atari ST, Amstrad CPC and Amiga versions of this tool are currently available.

Note : Please go to the download section to get the latest version.

Videos-demo of the HxC File Selector :

HxC File Selector HxC File selector
Amstrad CPC HxC File selector
(first version)
Amiga HxC File selector
(first version)


USB HxC Floppy Emulator

USB HxC Floppy Emulator hardware main features

click here for pictures and videos.

- Read only Floppy emulator (SD,DD,HD & ED mode)
( No Write Support ! Have a look to the SD Card version for the write support!)
- USB 1.1 device interface (based on the FTDI FT245.).
- MFM, FM and GCR compatible (can handle custom encoding).
- Bitrate between 63Kbits/s and 1MBits/s.(250 differents bitrates by step of 62.5ns).
- Variable bitrate, flakey bits and long tracks, custom tracks support (emulation of copy protected floppies).
- Can emulate floppies up to 128 tracks.
- "jumper free" design : Device configuration done by software.
- Flexible floppy interface: Shugart, IBM PC and Amiga compatible.

To see the list of computer tested with it, please go to this List

All necessary informations to build your own USB HxC Floppy Emulator are available here.

The main part of the USB HxC Floppy Emulator is a MAX EPM7128S CPLD from Altera with 128 Macrocell.
This chip is connected to a 32KB SRAM memory buffer and a FT245 from FTDI for the USB communication.

Caution!

Warning : Do not disconnect the floppy ribbon while the USB is connected ! This may damage the emulator and your equipements.

Always disconnect the USB cable before connect/disconnect the floppy ribbon.


USB HxC Floppy Emulator's schematic

USB HxC Schematic

USB HxC Floppy Emulator CPLD

The bitstream to use to program the CPLD is available here.
To program this chip you can use Quartus II and an Altera compatible JTAG probe (The ByteBlaster for example).
The CPLD programming software can be downloaded from the Altera/Intel website.

Note : The EPM7128S CPLD can also be remplaced with the Atmel ATF1508AS.

the CPLD pinout assignation :


HxC CPLD

There are four LEDs on the board:
D1 : Power LED.
D2 : Select LED : Is on when the target computer acccess the floppy disk.
D3 : Step LED : Is on when the target computer is stepping/changing track.
D4 : Link LED : This is the USB link status: Is on when dialoging the host PC.

The VHDL sources are available here : VHDL USB HxC Floppy Emulator sources


How to build the USB HxC Floppy Emulator ?

There are two differents USB HxC Floppy Emulator PCBs :

- An "homebrew" version (Rev B). This is a one layer "Do It Yourself" PCB.

- A "Production" version (Rev C). This is a two layers PCB. I recommend this version since it have a better layout.

Regarding the features of the board there are no differences between these two boards.

You can downlead the Schematic / PCB Layout / BOM of the revision B & C board here !

If you don't want build it, this board is also available to purchase. Have a look to the sale points section.

HxC Floppy Emulator software

HxC Floppy Emulator software

This software act as the floppy server with the USB HxC Floppy Emulator.
This program also allows you to convert floppy file images for the SD Card based HxC Floppy Emulator.
Supports many input floppy image file formats: List of the supported floppy image formats.

Notes:

- Supported operating systems :

-> Windows 2000 / XP / Vista / Seven / 10.
-> Mac OS X.
-> Linux.


- The USB HxC Floppy Emulator support is based on the FTDI D2XX Direct Drivers.
If you have the USB HxC Floppy Emulator you must install this driver.


The lastest software sources codes can be donwloaded on the GitHub project page :
HxCFloppyEmulator Github page


Note : Please go to the download section to get the latest software version.


Download


Here you can find the up-to-date softwares, firmwares and documentations :

Last update : February 10, 2025New!


Devices list :


SD Card HxC Floppy EmulatorSlim SD HxC

Download : SD HxC Floppy Emulators

SD HxC Floppy Emulators firmwares

> SD HxCFloppyEmulator firmware upgrade v1.8.7.1 (please have a look to the release notes for the latest changes)

> SD HxCFloppyEmulator beta firmware upgrade (Beta version!)

Slim SD HxC Floppy Emulators firmwares

> Slim SD HxCFloppyEmulator firmware upgrade v2.1.2.40 (please have a look to the release notes for the latest changes)

> Slim SD HxCFloppyEmulator beta firmware (Beta version!)

Softwares and tools

> HxCFloppyEmulator software v2.16.10.2 New! (please have a look to the release notes for the latest changes)

> HxCFloppyEmulator software beta/SNAPSHOT version (updated regularly)New!

> HxC Floppy Emulator DOS Disk Browser : A new DOS image type browser solution Please have a look to the README file for more details !

> Online / in-browser HxCFloppyEmulator software (experimental)New!

> VFD - Virtual Floppy Drive for Windows with DOS/FAT HFE files images support !

> ADF Opus - An Amiga floppy image browser with HFE files images support !

> Arburg COPYLOG Diskstation Emulator : A software solution to completely replace the Arburg COPYLOG Diskstation ! (Video demo !)


> HxC Floppy Emulator Manager/File selector (for Atari ST,Amstrad CPC and Amiga)

> HxCMount: https://hxcmount.atomas.com/


> Quick Install Disk Images : Some prepared SD Card images


> Softwares and Libraries sources can be found on GitHub:


Github
HxC Floppy Emulator Github page

Documentations

> General specifications : SDCard HxC Floppy Emulator

> General specifications : SDCard HxC Floppy Emulator (Japanese)


> User Manual : SDCard HxC Floppy Emulator User Manual (English)

> Manuel utilisateur : SDCard HxC Floppy Emulator User Manual (French) (Français)

> User Manual (Slim version) : Slim SD HxC Floppy Emulator User Manual (English)

> Software Step by Step guide : HxC Floppy Emulator Software User Manual (English)

Documentations (developer)

> HFE File format specifications : HxC Floppy Emulator HFE file format

> HXCSDFE.CFG config file specification : SDCard HxC Floppy Emulator HXCSDFE.CFG file

> SD HxC Floppy Emulator Direct access mode / remote control specification : SDCard HxC Floppy Emulator Direct Access mode

Other

> SD HxC Floppy Emulator mounting kit documentation.


USB Stick STM32 HxC Floppy Emulator (aka HxC Firmware for Gotek !)

Download : USB Stick HxC Floppy Emulator (aka HxC Firmware for Gotek !) New!

idocico.gifHxC Firmware for Gotek documentation and main page.

The following elements allow you to program the low cost Gotek USB Floppy Emulator with the HxC bootloader & Firmwares.

To purchase the firmware : Store !Buy!

USB HxC Floppy Emulators firmware for Gotek

> USB HxCFloppyEmulator firmware upgrade v5.1.2.1a (HFE + HFEv3 + ADF + ST + IMG + (E)DSK file and many others format support) New!
Please have a look to the release notes for the latest changes New!

> Online bootloader programmer (Instructions inside the zip file)

idocico.gifHxC Firmware for Gotek Usage guide / documentation.

> Online customization firmware ! Modify it as you want and receive the firmware in your email box some minutes later !New!

Softwares and tools

> HxCFloppyEmulator software v2.16.10.2 New! (please have a look to the release notes for the latest changes)

> HxCFloppyEmulator software beta/SNAPSHOT version (updated regularly)New!

> HxC Floppy Emulator DOS Disk Browser : A new DOS image type browser solution Please have a look to the README file for more details !

> Online / in-browser HxCFloppyEmulator software (experimental)New!

> VFD - Virtual Floppy Drive for Windows with DOS/FAT HFE files images support !

> ADF Opus - An Amiga floppy image browser with HFE files images support !

> Arburg COPYLOG Diskstation Emulator : A software solution to completely replace the Arburg COPYLOG Diskstation ! (Video demo !)


> HxC Floppy Emulator Manager/File selector (for Atari ST,Amstrad CPC and Amiga)

> HxCMount: https://hxcmount.atomas.com/


> Quick Install Disk Images : Some prepared SD Card images


> Softwares and Libraries sources can be found on GitHub:


Github
HxC Floppy Emulator Github page

USB HxC

Download : USB HxC Floppy Emulator

Driver :

> FTDI D2XX Direct Drivers

Softwares and tools

> HxCFloppyEmulator software v2.16.10.2 New! (please have a look to the release notes for the latest changes)

> HxCFloppyEmulator software beta/SNAPSHOT version (updated regularly)New!

> Online / in-browser HxCFloppyEmulator software (experimental)New!


> Quick Install Disk Images : Some prepared SD Card images


> Softwares and Libraries sources can be found on GitHub:


Github
HxC Floppy Emulator Github page

Other

> CPLD VHDL source code and bitstream

> Schematic & PCBs of the USB HxC Floppy Emulator

Download : Hardware download

You can find into the following archives all the hardware informations to build / repair an HxC Floppy Emulator :

> USB HxC Floppy Emulator (2007) Hardware files (Schematic, PCB GERBER, BOM...)

> SD HxC Floppy Emulator Rev C (2010) Hardware files (Schematic, PCB GERBER, BOM...)

> Slim SD HxC Floppy Emulator Rev A (2012) Hardware files (Schematic, PCB GERBER, BOM...)

Points of Sale

The USB HxC Floppy emulator and SD HxC Floppy Emulator are produced and sold by Lotharek.

Lotharek

Lotharek online shop:
https://lotharek.pl/

SD HxC Floppy Emulator REV F 3"1/2 Form factor/cased (HE10 34 pins interface)


Slim SD HxC Floppy Emulator


SD HxC Floppy Emulator REV C (HE10 34 pins interface


USB HxC Floppy Emulator


Retro Lemon

Retro Lemon

USB Stick STM32 HxC Floppy Emulator (HxC Firmware for Gotek) Store

USB Stick HxC (Firmware for Gotek)
Click on the above picture to visit the software store and get the HxC Firmware for Gotek License Buy!

Third party tools

WinImage (shareware) : a Windows program to create/modify dos/fat12 files images.
https://www.winimage.com/

ImageDisk : A DOS software to read/write floppy disk.
http://dunfield.classiccmp.org/img/

OmniFlop : a Windows program to read almost any kind of non standard floppy disk.
http://www.shlock.co.uk

VFD - Virtual Floppy Drive : a Windows Floppy disk drive emulator : This software is able to mount an .IMG file as a floppy disk drive under windows.
http://vfd.sourceforge.net/


Videos / pictures

All pictures / videos of the project can be found on this page!

Click here for pictures and videos of the project

Contributors

Jean-François DEL NERO (Jeff) Project Initiator - Main project developper/maintainer.
Gregory ESTRADE (Torlus) Forum hosting, FAT32 support of the SD HxC Floppy Emulator.
Christophe ESC. (Giants) Manufacturing of the First USB HxC Floppy Emulator batch.
Przemyslaw Krawczyk (Lotharek) Manufacturing and selling facilities.
Arnaud STORQ (Norecess) Amstrad CPC file selector optimization and support.
Gustavo E. A. P. A. Batista TRS-80 JV3 support implementation.
David Barr TRS-80 JV3 write support implementation.
Michael Gibs (gibs) Some incredible promotionals videos ;-)
Kris VC (Esynthesist) Providing a great help for the E-mu Emulator I & II support. (Technical informations and tests).
The Software Preservation Society Team Providing the first E-mu Emulator I & II floppy disk dump and E-mu track format.
Joseph REDON (Namida) NEC PC88 support tests.
Alex Mena x68000 support tests.
Petari Atari ST ST/MSA/STT support tests.
Jan Kiefer E-mu Emulator II tests.
Rosefloyd (One MPC Two DJ'S) E-mu SP1200 tests and some demos videos.

And thanks to all others project contributors !: Bugs reports, new ideas submiters, code contributors, spreading the word about the project !


HxC Floppy Emulator project Legal Mentions (C)2006-2026 HxC2001 / Jean-François DEL NERO