
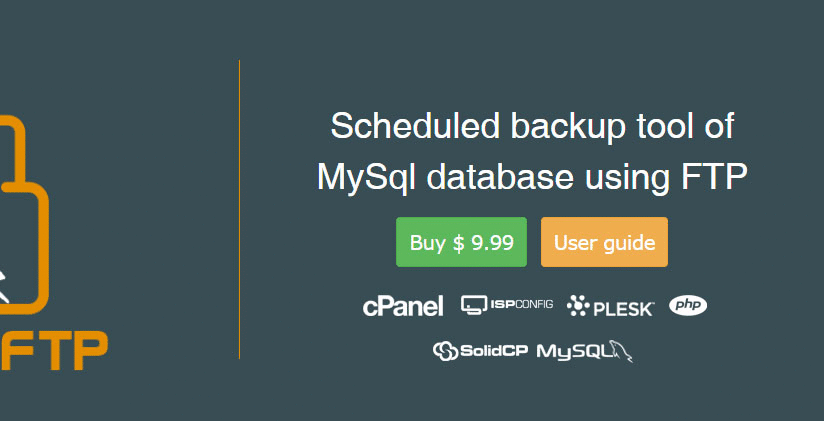
Scheduled backup tool of
MySql database using FTP


Scheduled backup tool of
MySql database using FTP
1. Make sure that ZipArchive extension is enabled in your PHP version
2. Download file
3. Edit file and insert your database credentials (Host, database name, username,
password) and insert FTP account (Host, username, password)
4. Upload files and local backup folder (db_backup)
to your website
5. Create corn job using your web control panel
To develop or customize a feature for a Minecraft 1.12 X-ray texture pack, you primarily work with JSON block models rather than just traditional .png textures. In Minecraft 1.12, the game uses these models to determine which parts of a block are rendered and which are transparent. Core Development: Making Blocks Transparent
Unlike standard texture packs, simply making a texture transparent in a photo editor will often result in "black" or opaque blocks in-game because the block model still tells the game to render those faces. To create a true X-ray effect, you must modify the blockstates or models/block files.
Identify Target Blocks: Locate the .json files for blocks you want to hide (e.g., stone.json, dirt.json, grass.json). These are found in assets/minecraft/models/block/.
Edit the JSON Model: To make a block invisible, you can change its model to a tiny, invisible point or remove its "faces." A common developer trick is to redirect the blockstate to a "null" or empty model.
Highlight Ores: For blocks you want to see (like Diamonds or Gold), you can modify their models to include an outline or a "glowing" effect by adding an extra layer in the JSON that uses a bright, high-contrast texture.
Pro Tip: Use a red outline for "Monster Blocks" (Silverfish) to warn users. Essential Feature Enhancements
Optifine Integration: For the best results, users should use Optifine. You can develop a feature that specifically leverages Optifine's "Connected Textures" (CTM) to create a cleaner grid-like look for underground caves.
Night Vision Support: Without light, X-ray packs just show black voids. You can include a custom environment texture or recommend the /effect @s night_vision command to make everything visible.
Smooth Lighting Toggle: Instruct users (or code a "read-me" splash) to turn off Smooth Lighting. This prevents the "shadow" effect that occurs when many blocks are made transparent, which can otherwise tank the frame rate. Available 1.12 Development Resources
If you are looking for a base to start from or to see how these files are structured, several established packs exist for 1.12.2:
Xray Ultimate: A standard for Java Edition that highlights minerals and supports various mods. minecraft 112 xray texture pack
XRay+: Specifically optimized for version 1.12.2 and below, using customized block models.
Better Xray: Good for seeing how to implement support for external mods like Thaumcraft or Applied Energistics.
Caution: Using X-ray features on public servers is generally considered cheating and will likely result in a ban. It is best used for single-player testing or private servers where allowed.
XRay Texture Pack for 2026 (Minecraft Java & Bedrock Edition)
The Ultimate Guide to Minecraft 1.12 Xray Texture Packs Minecraft 1.12, often referred to as the "World of Color" update, remains a powerhouse for modded gameplay and technical builders. However, finding elusive resources like diamonds and emeralds in this version can still be a massive time sink. This is where a Minecraft 1.12 Xray texture pack becomes a game-changer. Unlike complex mods that require external installers, an Xray texture pack is a lightweight resource file that makes common blocks like stone and dirt invisible, leaving only valuable ores in plain sight. Why Use an Xray Texture Pack in 1.12.2?
Version 1.12.2 is a "golden era" for technical Minecraft. Players often need massive quantities of redstone, iron, and diamonds to fuel automation and massive builds. Using an Xray pack provides several key advantages:
Time Efficiency: Skip the hours of "strip mining" and head directly to ore clusters.
Cave Finding: Easily locate hidden dungeon systems, mineshafts, and strongholds through walls.
Mod Compatibility: Top-tier packs like Xray Ultimate are compatible with major 1.12.2 mods such as Industrial Craft 2 and Thaumcraft, highlighting modded ores alongside vanilla ones. Top Minecraft 1.12 Xray Texture Pack Options
Several creators have optimized packs specifically for the 1.12.x rendering engine. Here are the most reliable choices: To develop or customize a feature for a Minecraft 1
Xray Ultimate: The industry standard. It is frequently updated and specifically designed to highlight ores while maintaining a small file size.
XRay+: A specialized version for 1.12.2 and below that works without altering block models, ensuring better performance on older hardware.
REX' PACK: A popular choice that replaces natural blocks with transparent models, allowing for high-clarity visibility of underground structures. How to Install a Minecraft 1.12 Xray Texture Pack
Installing these packs is straightforward and does not require Forge or a modded client. Follow these steps:
Download the Pack: Visit a reputable site like CurseForge and download the .zip file for version 1.12.
Open the Resource Folder: Launch Minecraft, go to Options > Resource Packs > Open Pack Folder.
Move the File: Drag and drop the downloaded .zip file into the folder that just opened.
Activate in Game: Return to the Minecraft menu. The pack should now appear in the "Available" list. Click the arrow to move it to the "Selected" column and click Done. Pro-Tips for Maximum Visibility
To get the most out of your Xray vision, you need to adjust a few graphical settings:
Installing an X-Ray texture pack in 1.12.2 is different than using a mod. Texture packs (resource packs) do not modify your game code, making them slightly safer. Here is the exact process. Part 3: Step-by-Step Installation Guide (Minecraft 1
Ensure the file extension is .zip. Do not unzip it. Minecraft reads compressed zip files directly.
This is the industry standard. It uses a clean, minimalist design. All ores glow with a neon border, making them visible at max render distance. It also turns chests into red squares and spawners into blue rotating gears.
An Xray texture pack (often called "Fullbright" or "Xray resource packs") is a modification to the game’s visual files. Unlike mods, which alter the game’s code, a resource pack simply changes the textures of the blocks in the game.
Here is how it works:
The result is a "Superman vision" effect where you can look at a cave wall and instantly see every ore vein hidden behind the stone.
Summary
What to expect (pros)
What to watch out for (cons & risks)
Features to look for
Installation (1-line)
Best practices
Verdict (concise)
Upload files and local backup folder (db_backup) to your website
How to use FTP client to upload your files
Once you’re connected to your server,
the Local Site area will show the files
and folders on your computer and the
Remote Site area will show the files
and folders on your Host server.
The easiest way to copy file to and from
the server is to simply drag and drop them
from one side to the other.
Create corn job using your web control panel
1. Log to your cPanel Account
2. Search for cron jobs scheduler
3. Setting up a cron job
4. Remember to click the ‘Add New Cron Job’ once you
have entered the right values in all fields. Cron jobs
are very useful especially when running web applications
on the internet. You will need them in one way or another
to automate repetitive tasks and we believe this guide has
shown you the basics of doing the same.