The STB EROM Upgrade v2.1.0 is a critical utility for users looking to manage, repair, or update the firmware on their digital satellite receivers and set-top boxes (STBs). This specialized Windows application acts as a "loader," bridging the gap between a PC and the STB's internal memory via a serial connection. Understanding STB EROM Upgrade v2.1.0
Modern set-top boxes rely on specific chipsets (like ALi) and firmware files (often with extensions like .abs or .sgn) to function. The v2.1.0 update provides a stable environment for:
Firmware Recovery: Reviving a "bricked" STB that won't boot due to corrupted software.
System Upgrades: Installing newer software versions to unlock features or fix bugs.
Data Dumps: Creating backups of existing software before making changes. Essential Requirements for Upgrading
Before starting, ensure you have the following hardware and software ready:
RS232 Serial Cable: This is the primary data link. If your modern PC lacks a 9-pin serial port, you must use a USB-to-RS232 adapter (such as one based on the CH340 chip).
Appropriate Firmware File: You need a compatible firmware file (usually .abs or .sgn) specific to your STB model ID.
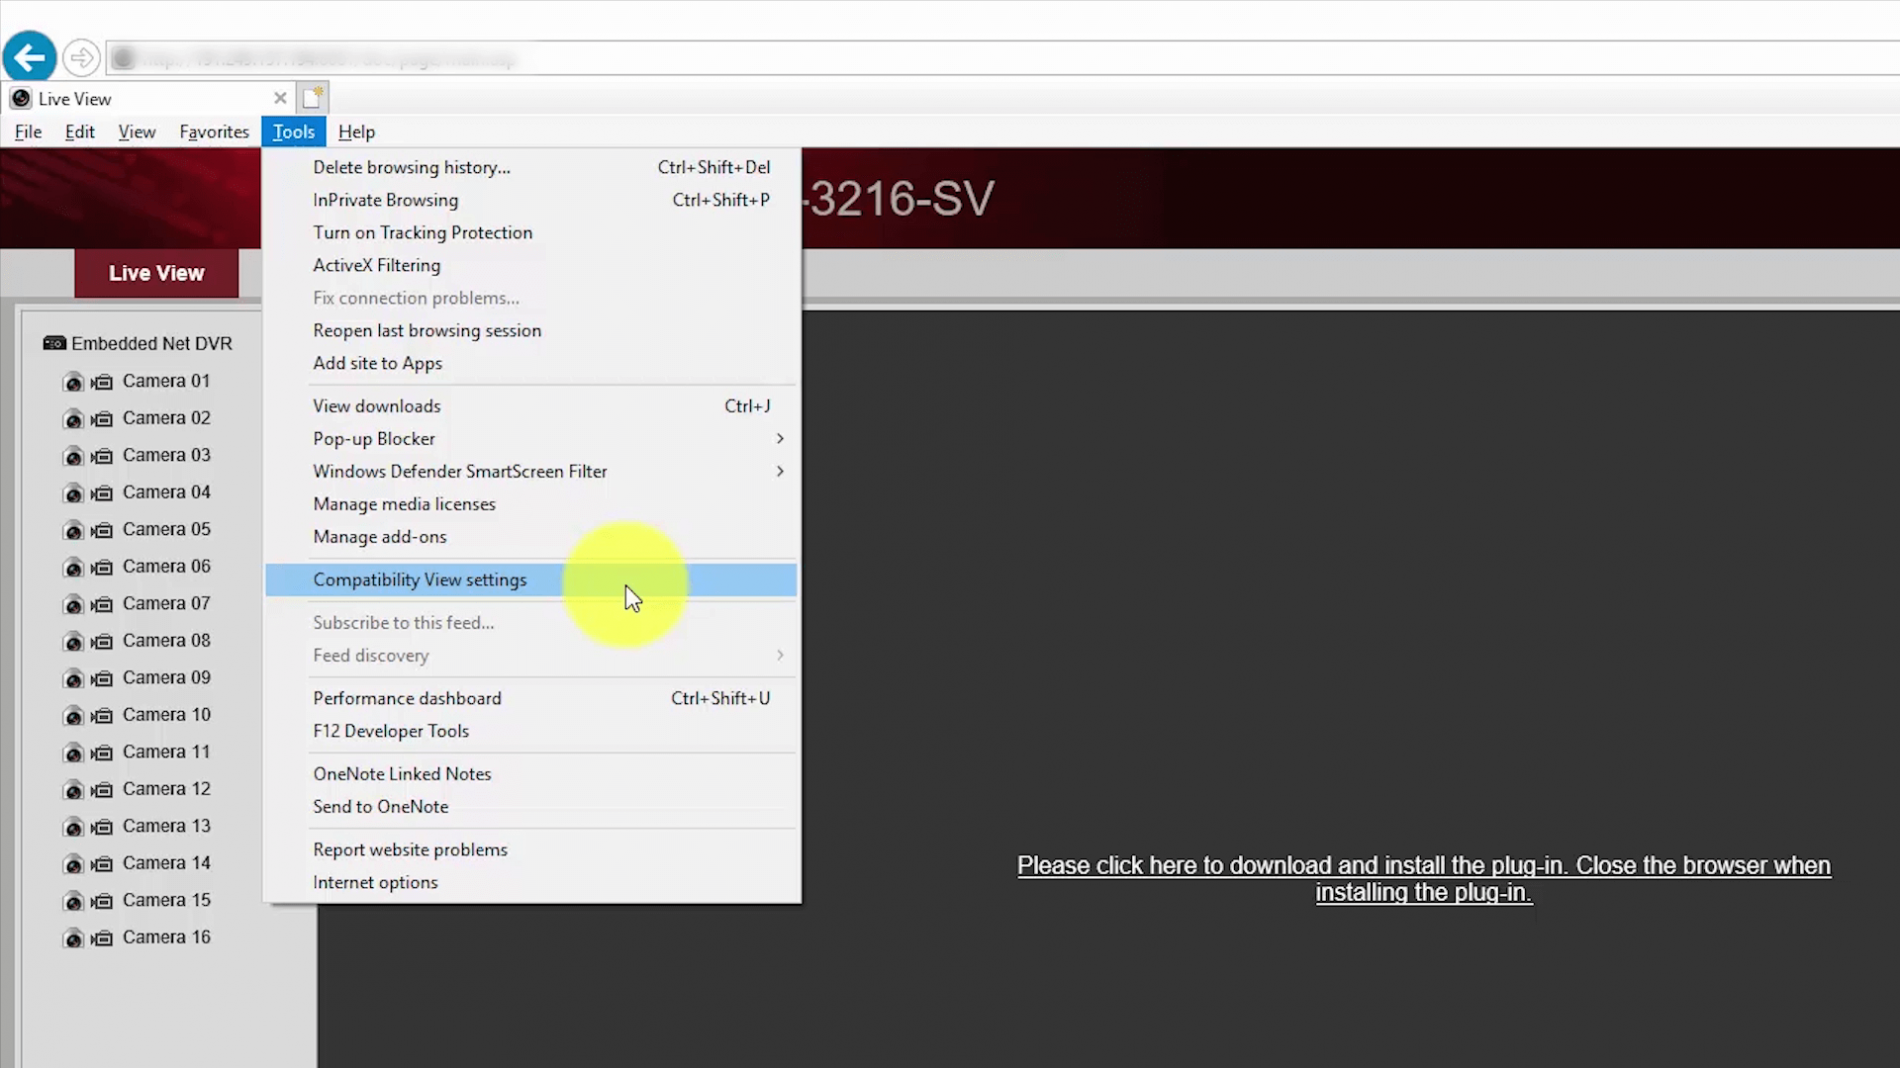
STB EROM Upgrade v210 Tool: The executable file (EromUpgrade.exe) must be running on a Windows PC. Step-by-Step Guide to Using the Updated v2.1.0 Tool stb erom upgrade v210 updated
Follow these instructions carefully to ensure a successful flash:
Connect the Hardware: Connect one end of the RS232 cable to your STB and the other to your PC. Ensure the STB is plugged into power but switched off.
Configure COM Ports: Right-click "My Computer" > "Manage" > "Device Manager" to identify which COM port your cable is using (e.g., COM 11).
Launch and Set Parameters: Open EromUpgrade.exe. In the settings panel, select the correct Port, set the Bits Rate to 115200, and set Parity to Even.
Select the Firmware: Set the Operate Mode to "Upgrade." Click Browse to find your update file. Critical Note: Always check the "Include Bootloader" box to ensure the system's startup logic is updated alongside the software.
Initiate Transfer: Click Next in the tool, then immediately turn on the STB. The software will show "Done" and begin the download process.
Flash the Memory: Once the download reaches 100%, the tool will prompt you to "burn the flash." Click Next again to finalize the installation.
Completion: Do not interrupt power until you see a "Download Success" or "Finished" message. The STB will reboot automatically with the new firmware. Safety Tips and Best Practices The STB EROM Upgrade v2
Backup First: Use the "Data Dump" mode in the tool to save your current software before attempting an upgrade.
Match Model IDs: Flashing firmware for a different model ID can permanently damage your device.
Stable Connection: Ensure your RS232 cable is securely connected; a disconnect during the "burning" phase can brick the STB.
For further troubleshooting, many users find detailed technical discussions and drivers on forums like Google Groups or community-driven documentation on Scribd.
Previous EROMs typically locked into 115200 bps for serial recovery. v210 introduces support for autobaud detection up to 921600 bps, cutting firmware upload times from 15 minutes to under 2 minutes.
After a successful write, disconnect the USB-TTL, remove any shorting jumpers, and restart the STB.
After successfully applying the STB EROM upgrade v210 updated, you will notice:
| SoC Family | Tool | PC Interface | |---------------------|--------------------------|---------------| | HiSilicon | HiTool 5.4.28 or later | USB‑to‑UART | | Amlogic | USB Burning Tool v2.2.4 | USB Type‑A | | Rockchip | RKDevTool v2.86 | USB (MaskROM) | Faster boot times – From 8 seconds down to 3–4 seconds
| Error Message | Likely Cause | Solution | |----------------|----------------|-----------| | "Target EROM not responding" | Bad UART connection or wrong baud rate | Check GND and swap RX/TX. Force baud to 115200 | | "Flash ID mismatch" | v210 file incompatible with flash chip | Find a patched v210 for your specific flash ID | | "Checksum error after write" | Power drop during flashing | Use a regulated power supply (not USB power from TTL) | | "Device stuck in reboot loop" | Incomplete EROM region | Re-flash with a verified clean binary |
Bootloader & boot flow
Secure boot & cryptography
Partitioning & storage
OTA & update process
Drivers & hardware support
Logging, telemetry & diagnostics